Cook Pork Butt in Oven
How to Cook Pork Butt in the Oven: Low and Slow Method, Temperature Chart, and Timing

As a chef who’s slow-cooked pork in every imaginable way, I can say with confidence that pork butt—also known as Boston butt or pork shoulder—is one of the most flavorful and forgiving cuts of meat you can cook. It’s rich in connective tissue, fat, and marbling, which means it transforms from tough to tender when cooked slowly at low temperatures. And while smokers and slow cookers have their place, the oven offers unbeatable control and consistency for home cooks.
- Why Pork Butt and Why the Oven?
- Essential Ingredients and Equipment
- Trimming and Prepping the Pork Butt
- The Low and Slow Oven Method: Step-by-Step
- Internal Temperature and Cooking Time Chart
- How to Finish With a Crust or Bark
- Can You Make It Faster in a Pressure Cooker?
- What About the Stovetop Method?
- Microwave? Only for Reheating
- Seasonings and Sauces That Work Every Time
- Common Mistakes and How to Avoid Them
- Flavor Variations I Recommend from Experience
- How to Shred and Serve Pork Butt
- What to Serve With Pork Butt
- How to Store and Reheat Without Drying Out
- Flavor Variations I Recommend from Experience
- Pork Butt for Entertaining: My Hosting Strategy
- Final Thoughts: Why This Method Always Delivers
- FAQ: 15 Real Questions About Oven-Roasted Pork Butt (with Chef’s Advice)
Why Pork Butt and Why the Oven?
Using the oven allows you to maintain stable heat for extended periods, build bark (that coveted crust), and finish with either a high-heat blast or a low-simmering rest. It’s the ultimate method for beginners and professionals alike. If you follow the right steps, you’ll get fall-apart, juicy pork that rivals any barbecue joint—without ever leaving your kitchen.
Essential Ingredients and Equipment
To prepare a flavorful pork butt using the low and slow oven method, you’ll need a few key ingredients and basic kitchen tools. These are the same components I use in my professional kitchen when I want a guaranteed tender, juicy roast:
Ingredients:
- 1 pork butt (4–8 pounds) — either bone-in or boneless; bone-in gives slightly more flavor, while boneless is easier to shred.
- 2–3 tablespoons olive oil or neutral oil — used to help the seasoning adhere and assist with browning.
- 2 tablespoons kosher salt — essential for drawing out moisture and seasoning the meat thoroughly.
- 1 tablespoon coarse ground black pepper — adds heat and depth.
- 1 tablespoon smoked paprika — brings color and a subtle smokiness.
- 1 tablespoon garlic powder — rounds out the savory notes.
- 1 teaspoon cumin or mustard powder (optional) — adds warmth or sharpness.
- 2 tablespoons brown sugar (optional) — ideal for a sweet-savory rub.
- ¼ cup apple cider vinegar, broth, or beer (optional) — used for extra moisture or in a pan sauce.
- Your favorite BBQ sauce or glaze (optional) — for finishing or serving.
Equipment:
- Roasting pan or Dutch oven — sturdy enough for long oven cooking.
- Aluminum foil — used to tent or wrap the meat during part of the cooking.
- Wire rack (optional) — elevates the meat to allow even circulation.
- Meat thermometer (instant-read or probe-style) — crucial for checking internal temperature.
- Cutting board and large tongs — for transferring and shredding the finished pork.
Trimming and Prepping the Pork Butt
Before cooking, I inspect the pork for excess fat. I usually trim down any thick fat caps to about a quarter inch, which helps render fat slowly without making the meat greasy. I also remove any silverskin or tough connective tissue from the exterior.
Next, I slather the pork in oil, then apply a generous coating of seasoning or dry rub. I press it in firmly so it adheres well, and then let it rest—either at room temperature for an hour or refrigerated overnight, uncovered, for better bark development. This step is critical: well-seasoned meat going into a cold oven will emerge deeply flavorful and caramelized.
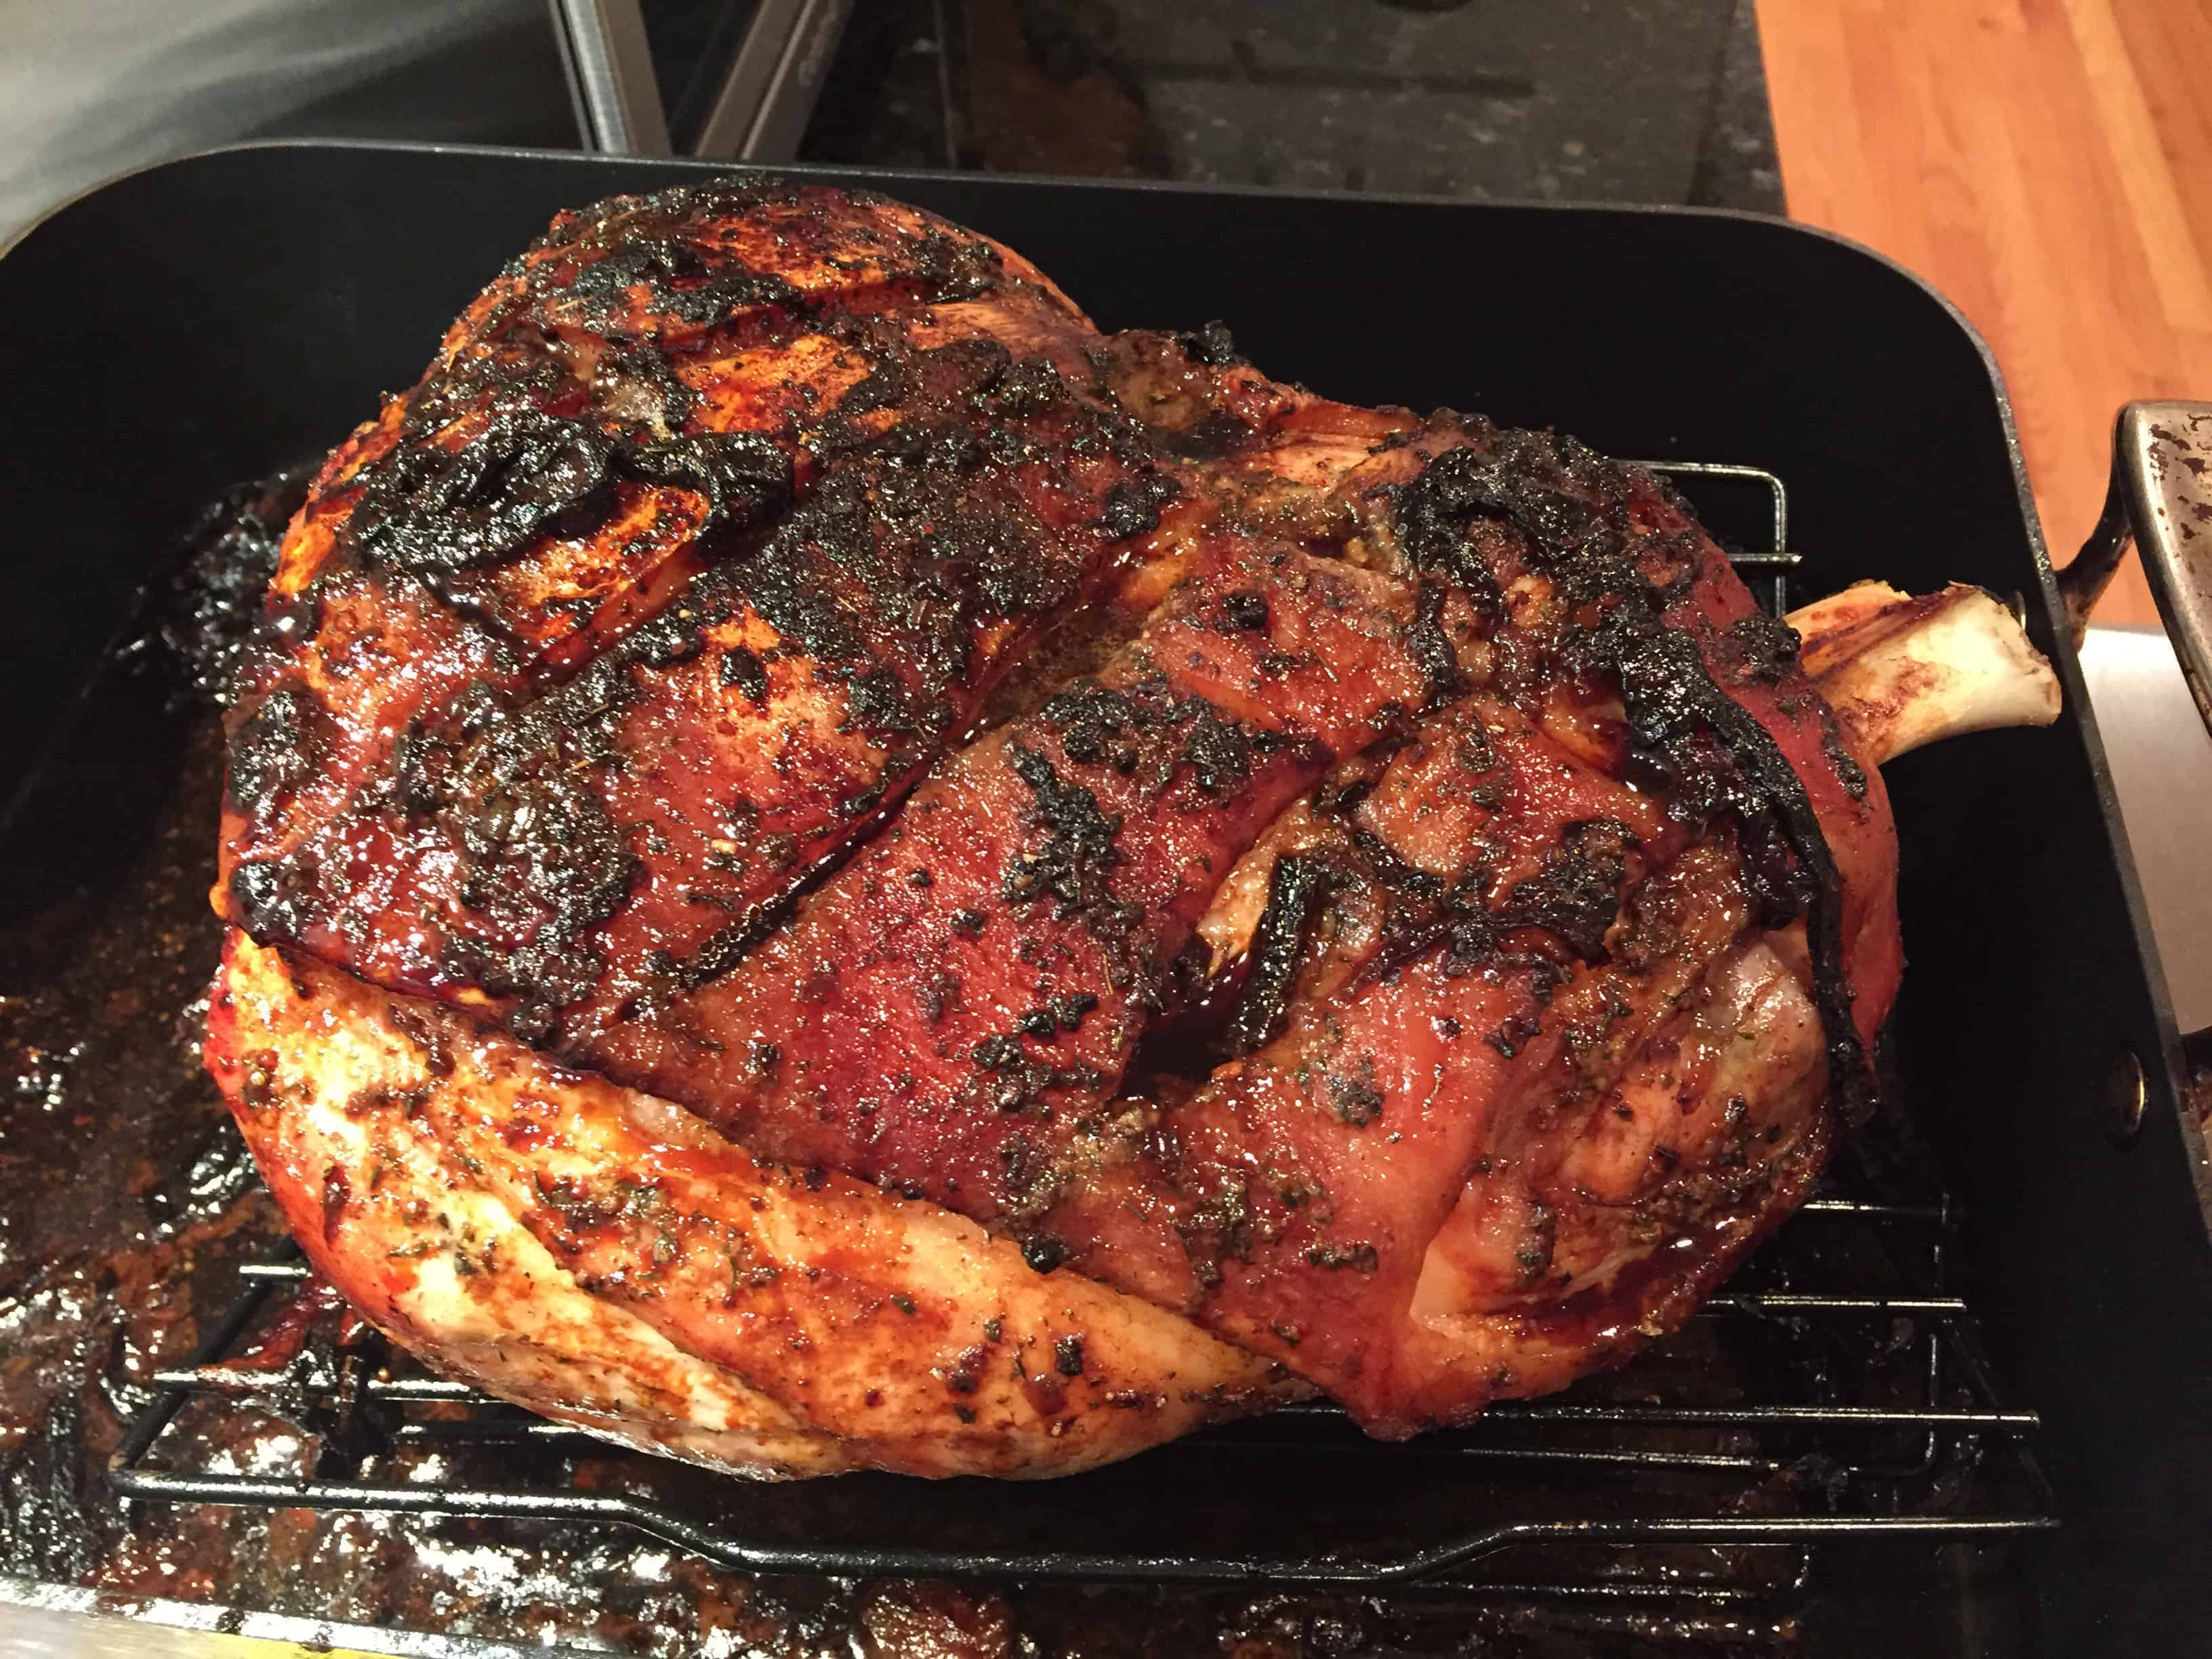
The Low and Slow Oven Method: Step-by-Step
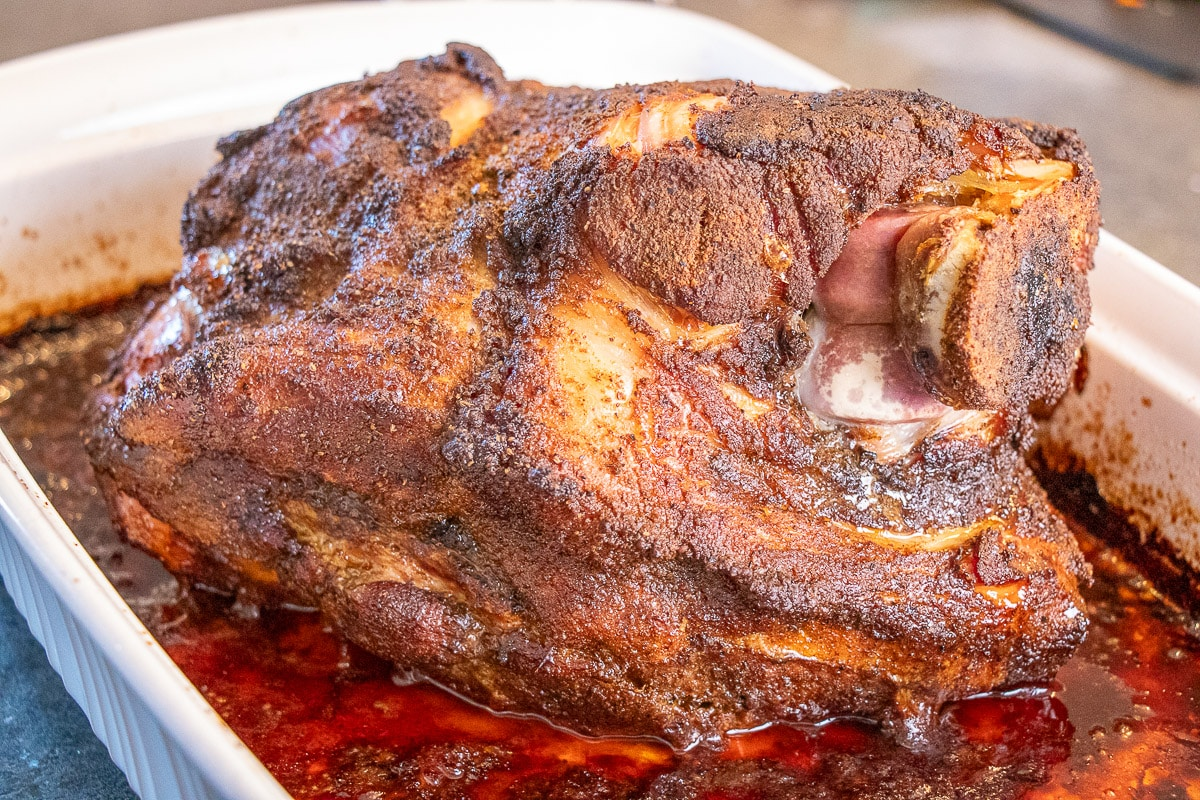
I always preheat my oven to 250°F (121°C). This temperature allows the collagen in the pork to break down gradually, resulting in ultra-tender meat. I place the pork fat-side up in a roasting pan or Dutch oven, and loosely tent with foil.
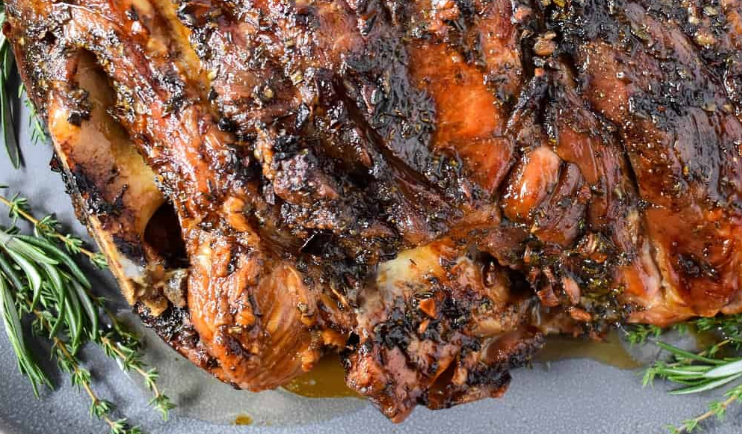
Depending on the size, cooking takes about 90 minutes per pound. I don’t open the oven unless necessary. The meat is “done” when it hits an internal temperature of 195–205°F (90–96°C) and shreds easily with a fork.
After reaching temperature, I remove the pork from the oven, tent it with foil, and let it rest for at least 30 minutes. Skipping this step will lead to dry, steam-evaporated slices. I’ve seen it too many times—even great meat ruined by impatience.
Internal Temperature and Cooking Time Chart
| Internal Temp | Result | Cooking Time Estimate |
| 165°F (74°C) | Sliced pork | ~60–75 min per pound |
| 190°F (88°C) | Almost shreddable | ~75–90 min per pound |
| 195–205°F | Fully shreddable | ~90–100 min per pound |
For true pulled pork texture, I always aim for 200°F, then rest the meat for optimal moisture.
How to Finish With a Crust or Bark
To enhance texture, I often uncover the pork during the last 30–45 minutes of cooking. This exposes the surface to dry heat, forming that dark, caramelized bark that adds complexity and chew. If I want extra color, I crank the oven up to 450°F (232°C) for 10 minutes at the end. It’s a finishing move that adds flavor and visual appeal without drying out the interior.
Can You Make It Faster in a Pressure Cooker?
Yes—and I’ve done it often when short on time. While you won’t get the same bark, the Instant Pot or pressure cooker can deliver fork-tender results in 75–90 minutes under pressure. I sear the pork first, then add broth and aromatics, and cook on high pressure. Afterward, I broil the meat briefly to mimic crust.
It’s a trade-off—speed over surface—but still yields excellent pulled pork when time is tight.
What About the Stovetop Method?
While less common, I’ve cooked pork butt on the stovetop using a Dutch oven. I sear the meat on all sides, then simmer it in broth or a braising liquid for several hours on low heat. It takes monitoring and stirring, but the result is similar to oven-roasting—especially for shredded pork.
This method is great when you can’t use the oven or want more control over the liquid reduction.
Microwave? Only for Reheating
Never cook pork butt from raw in the microwave. It simply can’t render fat or collagen properly. But for leftovers, I reheat sliced or shredded pork in the microwave using 50% power, covered with a damp towel, and stirred halfway through. It’s not ideal, but it works for convenience. Always add a spoonful of cooking juices to keep it moist.
Seasonings and Sauces That Work Every Time
I’ve used hundreds of seasoning blends on pork butt over the years. My base always includes salt, black pepper, garlic powder, and smoked paprika. From there, I go sweet (brown sugar, cumin, mustard) or spicy (chili powder, cayenne, chipotle).
For sauce, a classic BBQ base works well. I love pairing rich pulled pork with vinegar-based sauces, mustard glazes, or spicy chipotle honey sauce. For global flavor, I use soy sauce, ginger, sesame oil, or hoisin-based glazes.
No matter the direction, the sauce should balance richness, not overpower it.
Common Mistakes and How to Avoid Them
The most frequent mistake I see is undercooking. Pork butt needs to reach a high internal temp to become tender—anything below 190°F leaves it rubbery. Another misstep is cutting into the meat too soon. I’ve ruined excellent pork in the past by slicing before resting—it deflates and loses all its juices.
Using too much liquid is another error. Pork releases moisture naturally; you don’t need to drown it. A splash of broth or cider is enough. Finally, failing to season generously leaves the meat bland. This cut needs bold, layered flavor—it can handle it.
Flavor Variations I Recommend from Experience
Over the years, I’ve developed several flavor variations that never fail. One of my favorites is Carolina-style, with a vinegar-pepper rub and tangy mop sauce. It’s sharp, clean, and fantastic with slaw.
For sweet and smoky notes, I love a bourbon-maple rub, followed by a brown sugar glaze near the end. When I want something more exotic, I go with a Korean-inspired version, using gochujang, garlic, ginger, and sesame oil.
I encourage beginners to experiment: keep the technique the same, but let the seasonings reflect the occasion or mood.
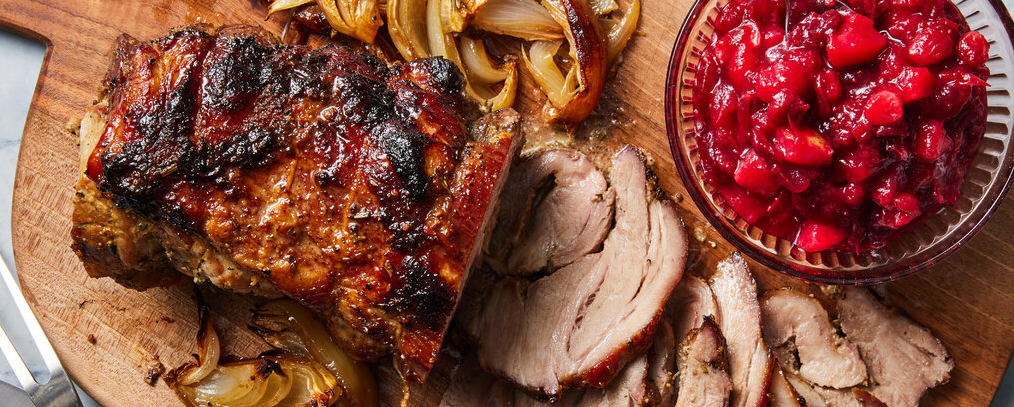
How to Shred and Serve Pork Butt
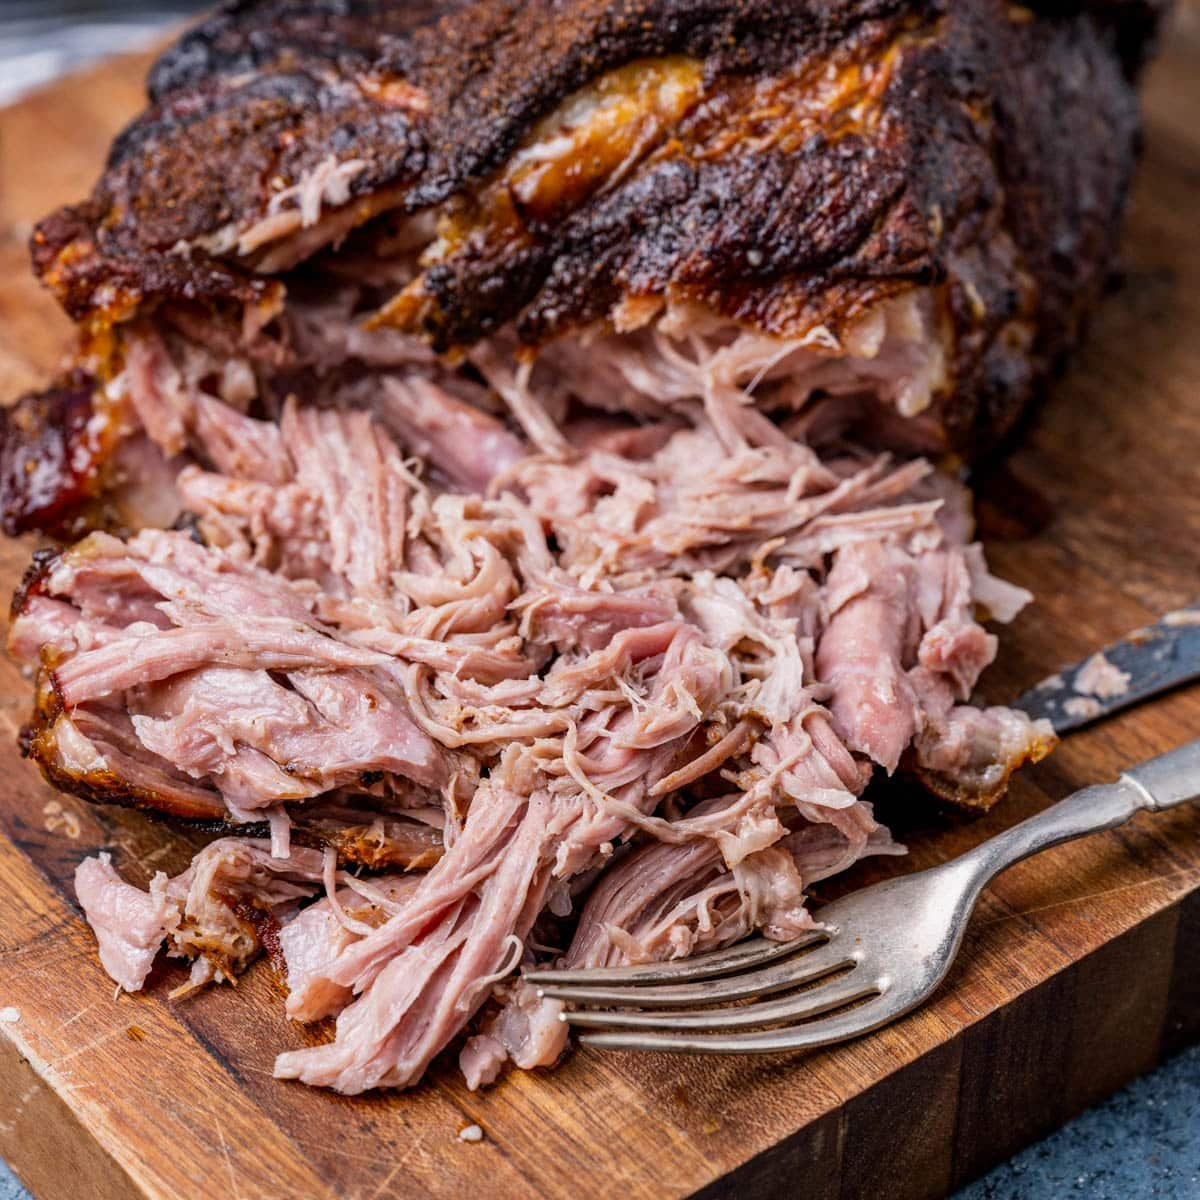
Once the pork butt has rested properly—and I always recommend a minimum of 30 minutes, preferably closer to 45—it’s time to shred. I transfer the roast to a large cutting board or tray with a lip to catch any residual juices. If the meat is cooked correctly, it will yield easily to the touch. I usually use two forks for the initial pulling, but when it’s cooled slightly, I prefer using gloved hands. This gives me more control in separating the strands and removing any large pockets of fat or connective tissue that didn’t fully render.
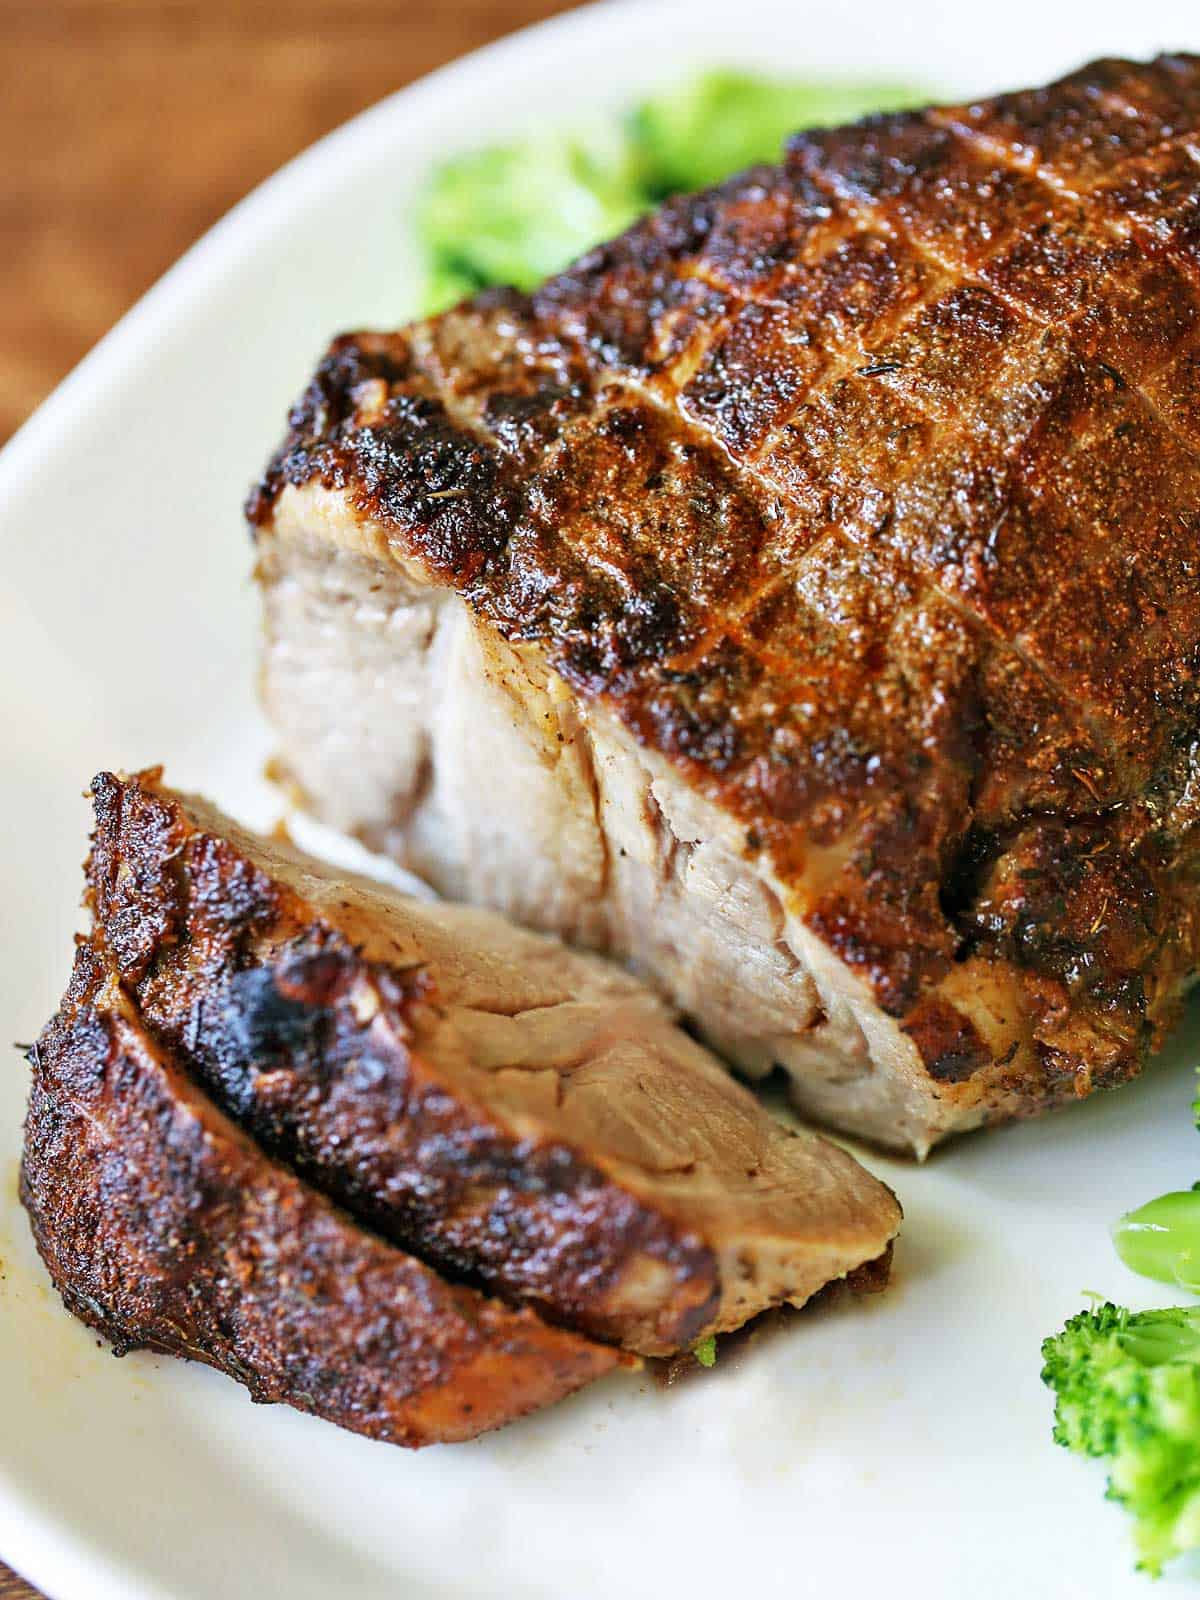
For slicing (which works well if I pulled the roast at around 185–190°F), I always go against the grain, using a sharp carving knife to cut thick, even slices. These slices are great for serving family-style with pan juices spooned over the top.
When it comes to shredded pork, I like to mix the meat gently with a few spoonfuls of the cooking juices or sauce—this prevents dryness and keeps every bite flavorful. If I’m serving to guests, I often arrange the pork in a warm bowl or deep platter, lightly glazed, and garnished with a touch of fresh herbs or citrus zest. It turns rustic into refined.
What to Serve With Pork Butt
After years of cooking pork butt for everything from casual picnics to plated dinners, I’ve developed a solid framework for side pairings. The key is balancing the pork’s richness with contrasting textures and flavors.
For traditional barbecue, I go with familiar classics: creamy coleslaw to add crunch and vinegar bite, baked beans for sweetness and depth, and soft rolls or cornbread to soak up sauce. But I often elevate things depending on the setting.
If I’m preparing pork butt for a more modern presentation, I pair it with roasted root vegetables—carrots, parsnips, or sweet potatoes tossed in olive oil and rosemary. I’ll also add a bright slaw with apples, fennel, and lemon vinaigrette. For more international flair, I’ve served pork over steamed jasmine rice with quick-pickled cucumbers and chili oil, or in tacos with pineapple salsa and lime crema.
Whatever direction I take, I always include at least one acidic component to cut the fat and a soft starch to anchor the dish.
How to Store and Reheat Without Drying Out
Proper storage and reheating are essential—especially after you’ve invested 8+ hours cooking low and slow. Once the pork butt cools to room temperature (which usually takes about 45 minutes if left uncovered), I portion it into airtight containers. If I’m working with shredded meat, I mix it with a few spoonfuls of reserved cooking liquid or a splash of broth before sealing. This extra moisture ensures the pork reheats without drying.
In the refrigerator, the pork keeps beautifully for up to four days. For longer storage, I pack it into freezer-safe containers or bags, label the date, and freeze for up to three months. I always freeze in small portions—enough for one or two servings—so I don’t have to thaw more than I need.
To reheat, my go-to method is in the oven: I preheat to 300°F (150°C), cover the pork with foil, and warm for about 20–25 minutes. For stovetop, I reheat the meat in a skillet with a splash of water or sauce, covered, over low heat. When using a microwave, I reduce the power to 50%, cover with a damp paper towel, and stir halfway through. With gentle heat and some added moisture, the meat stays just as juicy and flavorful as the day it was cooked.
Flavor Variations I Recommend from Experience
Over time, I’ve experimented with dozens of flavor profiles for pork butt—and some have become staples I return to again and again. One of my favorite approaches is Carolina-style pulled pork. I season the meat with a vinegar-pepper rub, cook it uncovered to build bark, and finish with a tangy vinegar sauce. The sharp acidity balances the richness of the meat, and it’s perfect for sandwiches with slaw.
For a bourbon-maple twist, I combine brown sugar, mustard, and paprika with a touch of cinnamon in the dry rub. Near the end of cooking, I brush on a glaze made of bourbon, maple syrup, and a splash of apple cider vinegar. This variation works especially well in the fall and pairs beautifully with roasted squash or sweet potatoes.
When I want bold flavor, I go Korean-inspired. I rub the pork with gochugaru, garlic, and sesame oil, and finish it with a glaze made from soy sauce, brown sugar, rice vinegar, and gochujang. I serve this version with pickled daikon and sticky rice for a vibrant, flavorful meal.
Regardless of the flavor path, I always adjust my sauce and side choices to harmonize with the rub—and I taste the glaze before applying to ensure balance.
Pork Butt for Entertaining: My Hosting Strategy
When cooking pork butt for gatherings, my goal is to serve food that impresses yet feels comforting. I almost always opt for a bone-in roast, not just for flavor but because it makes a dramatic presentation when pulled apart tableside. I start cooking early in the day so I can let the meat rest for at least an hour before service—this gives me time to prepare sauces, sides, and garnish.
For buffet-style events, I keep the shredded pork warm in a covered Dutch oven or a slow cooker on the “warm” setting. I offer a couple of sauces—usually one classic BBQ and one acidic or spicy—and a platter of toppings like pickled onions, fresh herbs, or citrus wedges. Buns or tortillas are optional, depending on the style.
If I’m hosting a more formal dinner, I slice the pork instead of shredding, arrange it neatly on platters, and finish with a spoonful of pan juices and microgreens. The idea is always the same: let the pork be the star, but dress the stage around it for the occasion.
Final Thoughts: Why This Method Always Delivers
I’ve cooked pork butt every way imaginable—smoked, sous-vide, pressure cooked—but roasting it low and slow in the oven remains one of the most consistent and satisfying methods. It doesn’t require specialized equipment, and it rewards patience with unmatched texture and depth of flavor. You control the seasoning, the heat, the rest time—and that means fewer surprises and more predictable results.
When you cook pork butt with care—from seasoning to shredding—you’re not just making dinner. You’re building flavor over hours. You’re coaxing transformation out of a tough cut. And when you finally pull it apart and serve it—whether on a bun, over grains, or beside roasted vegetables—you get more than a plate of food. You get something unforgettable, made from nothing but salt, heat, time, and attention.
FAQ: 15 Real Questions About Oven-Roasted Pork Butt (with Chef’s Advice)
Should I cook pork butt covered or uncovered in the oven?
In my experience, starting covered is the key to locking in moisture during the early stages. I usually roast the pork butt covered with foil or a lid for the first several hours, then uncover it toward the end to develop a crust. This two-phase approach gives you tender meat with a beautiful bark. Cooking uncovered the entire time risks drying out the surface.
How long should I cook a 5-pound pork butt in the oven?
I recommend cooking it at 250°F (121°C) for about 7 to 8 hours, but more importantly, focus on internal temperature. I always cook until it reaches 195–205°F (90–96°C). At that range, the collagen breaks down fully and the meat becomes fork-tender. Relying only on time is a common mistake—I’ve learned the hard way.
Can I marinate pork butt before roasting?
Yes, and I’ve done it many times. For Asian or Latin-inspired recipes, a marinade can add great flavor. But for classic low-and-slow pork, I usually use a dry rub. It helps form bark and penetrates more deeply over long cook times. Just avoid marinating in high-acid liquids overnight, which can damage the meat’s texture.
Should I add liquid to the roasting pan?
I’ve found that a small amount of liquid—about ¼ cup of apple cider vinegar, broth, or beer—can help create a moist environment, especially if the pan is shallow. But don’t submerge the pork. It releases plenty of natural juices. The goal is humidity, not braising.
What if I don’t have a meat thermometer?
I highly recommend using one, but if you don’t have it, go by feel. Properly cooked pork butt should pull apart easily with two forks, and if it’s bone-in, the bone should slide out cleanly. Still, I always advise investing in a thermometer—it’s your best insurance.
How do I get a nice crust on the pork butt?
To build bark, I remove the foil for the final 30–45 minutes and increase the oven to 400–450°F (204–232°C). Sometimes I even broil for a few minutes. A good dry rub with sugar, paprika, and spices also contributes to crust formation. The key is drying out the surface gently—not rushing it.
What’s the ideal internal temperature for pulled pork?
From my experience, 195–205°F (90–96°C) is the magic range. That’s when the connective tissue breaks down completely and the pork shreds with minimal effort. I’ve pulled meat at 185°F before—it sliced fine, but it wasn’t soft enough for sandwiches or tacos.
Can I freeze leftover pork butt?
Absolutely. I always cool the meat completely, then portion it into containers with a little juice or sauce to keep it moist. It freezes well for up to 3 months, and I often make extra just for this reason. It’s great to have shredded pork ready for quick meals.
How do I reheat pork butt without drying it out?
I reheat it in a covered dish at 300°F (150°C) with a splash of broth or pan juices. On the stovetop, I warm it slowly with a lid and low heat. In the microwave, I use 50% power, cover with a damp paper towel, and stir halfway through. Gentle heat and moisture are key.
Can I cook pork butt at a higher temperature to save time?
You can, but I don’t recommend it for best results. I’ve tested roasting at 300°F and even 325°F, and while it still works, you lose the even breakdown of collagen and risk drying the outer layers. Low and slow always gives better texture, especially if you want shreddable meat.
What kind of rub do you recommend?
My go-to rub includes salt, black pepper, garlic powder, smoked paprika, and brown sugar. I’ve used cumin, cayenne, mustard powder, and chili flakes depending on the flavor direction. A good rub brings balance: savory, smoky, and just a hint of sweet.
Should I rest the pork butt before shredding?
Yes—always rest the pork for at least 30 minutes after roasting. I’ve made the mistake of shredding too soon, and the juices ran out, leaving the meat noticeably drier. Cover loosely with foil and let it relax. You’ll be glad you did.
Can I use a boneless pork butt instead of bone-in?
Yes, and I do it often. Boneless is easier to handle and quicker to shred. Bone-in tends to give slightly more flavor and moisture in my experience, but both work beautifully when slow-cooked.
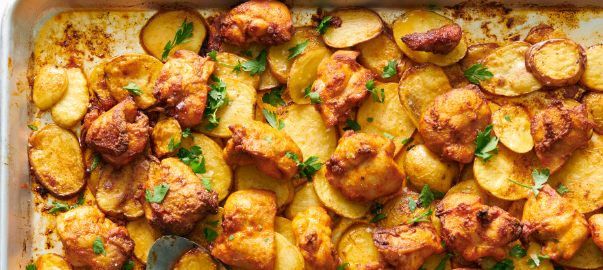
What sides go best with pork butt?
I often pair it with creamy coleslaw, baked beans, or roasted potatoes. For lighter fare, I go with citrus slaw, grilled corn, or even grain salads. Acidic and crunchy elements balance the richness. I recommend including something vinegary or citrus-based on every plate.
What’s your number one tip for beginners?
Take your time. This cut rewards patience like few others. I always remind beginners that low and slow isn’t just a technique—it’s a mindset. Season boldly, don’t rush the process, and let the meat tell you when it’s done. If you respect the timing and temperature, pork butt will always deliver.
Post Comment